Work Text:
Materials
- 3.25 mm crochet hook (US size D)
- Super Fine Weight Yarn (I used Hobbii Rainbow and Friends Cotton 8/4)
- Black
- Brown
- Grey
- Red
- Light grey
- Cotton Fabric (stiffened with fray check)
- Black
- White
- Red
- Fiberfill or stuffing of your choice
- Fabric glue
- Yarn needle
Stitches needed (all in American terms)
- Slip knot (sk)
- Magic circle
- Single crochet (sc)
- Slip stitch (sl)
- Double crochet (dc)
- Half double crochet (hdc)
- Increase (inc)
- Decrease (dec)
Notes:
- This is made with cotton yarn. Cotton yarn does not stretch in the way many other yarns do so you will likely have to test a few times to get tension right. I had a very tight tension while making this project.
- For the fabric I used a standard quilting cotton. Before cutting the shapes I put fray check over the entire piece and let it dry. This stiffens it and keeps it from falling apart. Felt was too thick to get the detail I wanted.
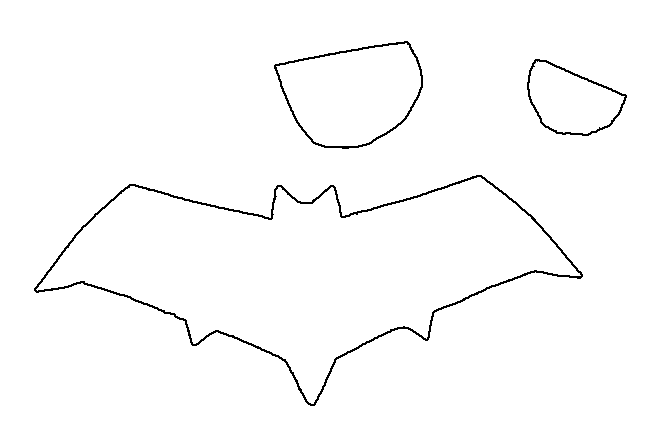
- Be careful with the pattern pieces for the fabric while working. They are tiny. I highly recommend cutting them out from paper and then using that to cut. You can get better detail that way.
Legs (make two)
Start in color 1 (black)
Round 1: 6 sc into magic circle (6)
Round 2: inc 6 times (12)
Round 3: *inc, sc* repeat around (18)
Round 4: sc in back loop only around (18)
Round 5: sc around (18)
Round 6: 3 sc, *dec, sc* x3, 6 sc (15)
Round 7: 3 sc, *dec* x3, 6 sc (12)
Round 8: sc around (12)
Round 9: sc around, at the end of round swap to color 2 (grey) (12)
Rounds 10-20: sc around (12)
Body + Head
The body picks up where the legs end so the round count will as well.
Round 21: Using color 2 (grey). Line up both legs so that they are facing forward. Create a slip knot on your hook and through the point where the legs meet sc them together. (This video has a visual at about the 10 minute mark demonstrating what I mean). Then sc around making sure you have 24 stitches at the end (24)
Round 22: sc around (24)
Round 23: *3 sc, inc, 4 sc* x3 (27)
Round 24: *inc, 8 sc* x3 (30)
Round 25-26: sc around, swap to color 1 at end (30)
Round 27: sc around, swap to color 2 (grey) (30)
* I like to overlap the black by one stitch and move my end of round there. It make it more secure.
Rounds 28-36: sc around (30)
Round 37: 4 sc (the point here is to get to one side to make the shoulders, you may be off a couple stitches from me), dec, 4 sc (these should be centered on the side of the leg), dec, 7 sc, dec, 4 sc, dec, 3 sc (26)
Round 38: 4 sc ,dec, 2 sc, dec, 7 sc, dec, 2 sc, dec, 3 sc (22)
Round 39: 4 sc ,dec x2, 7 sc, dec x2, 3 sc (18)
Round 40: *sc two together, sc* x6 (12)
Round 41: sc around, swap color 3 (red) (12)
Stuff if you have not already
Round 42: sc around (12)
Round 43: *inc, sc* x6 (18)
Round 44: *2 sc, inc* x6 (24)
Round 45: *sc, inc, 2 sc* x6 (30)
Rounds 46-50: sc around (30)
Round 51: *sc, dec, 2 sc* x6 (24)
Round 52: *2 sc, dec* x6 (18)
Round 53: *sc two together, sc* x6 (12)
Finish stuffing
Round 54: sc two together around (6)
Finish off and pull tail into the body.
Arms (make two)
Start in color 1 (black)
Round 1: 4 sc into magic circle (4)
Round 2: inc x4 (8)
Round 3: *inc, sc* x4 (12)
Rounds 4-5: sc around (12)
Round 6: *dec, sc* x4 (8)
Round 7: sc around, at end switch to color two (grey) (8)
Rounds 8-19: sc around (8)
Stuff arm
Round 20: Starting in the first stitch in the previous row and the last stitch, sl through both. Repeat with the second and second to last from previous row. Repeat across closing the arm (4)
Finish leaving a long tail for sewing
Sew arms onto the body 4 rows down from where the head color change happens.
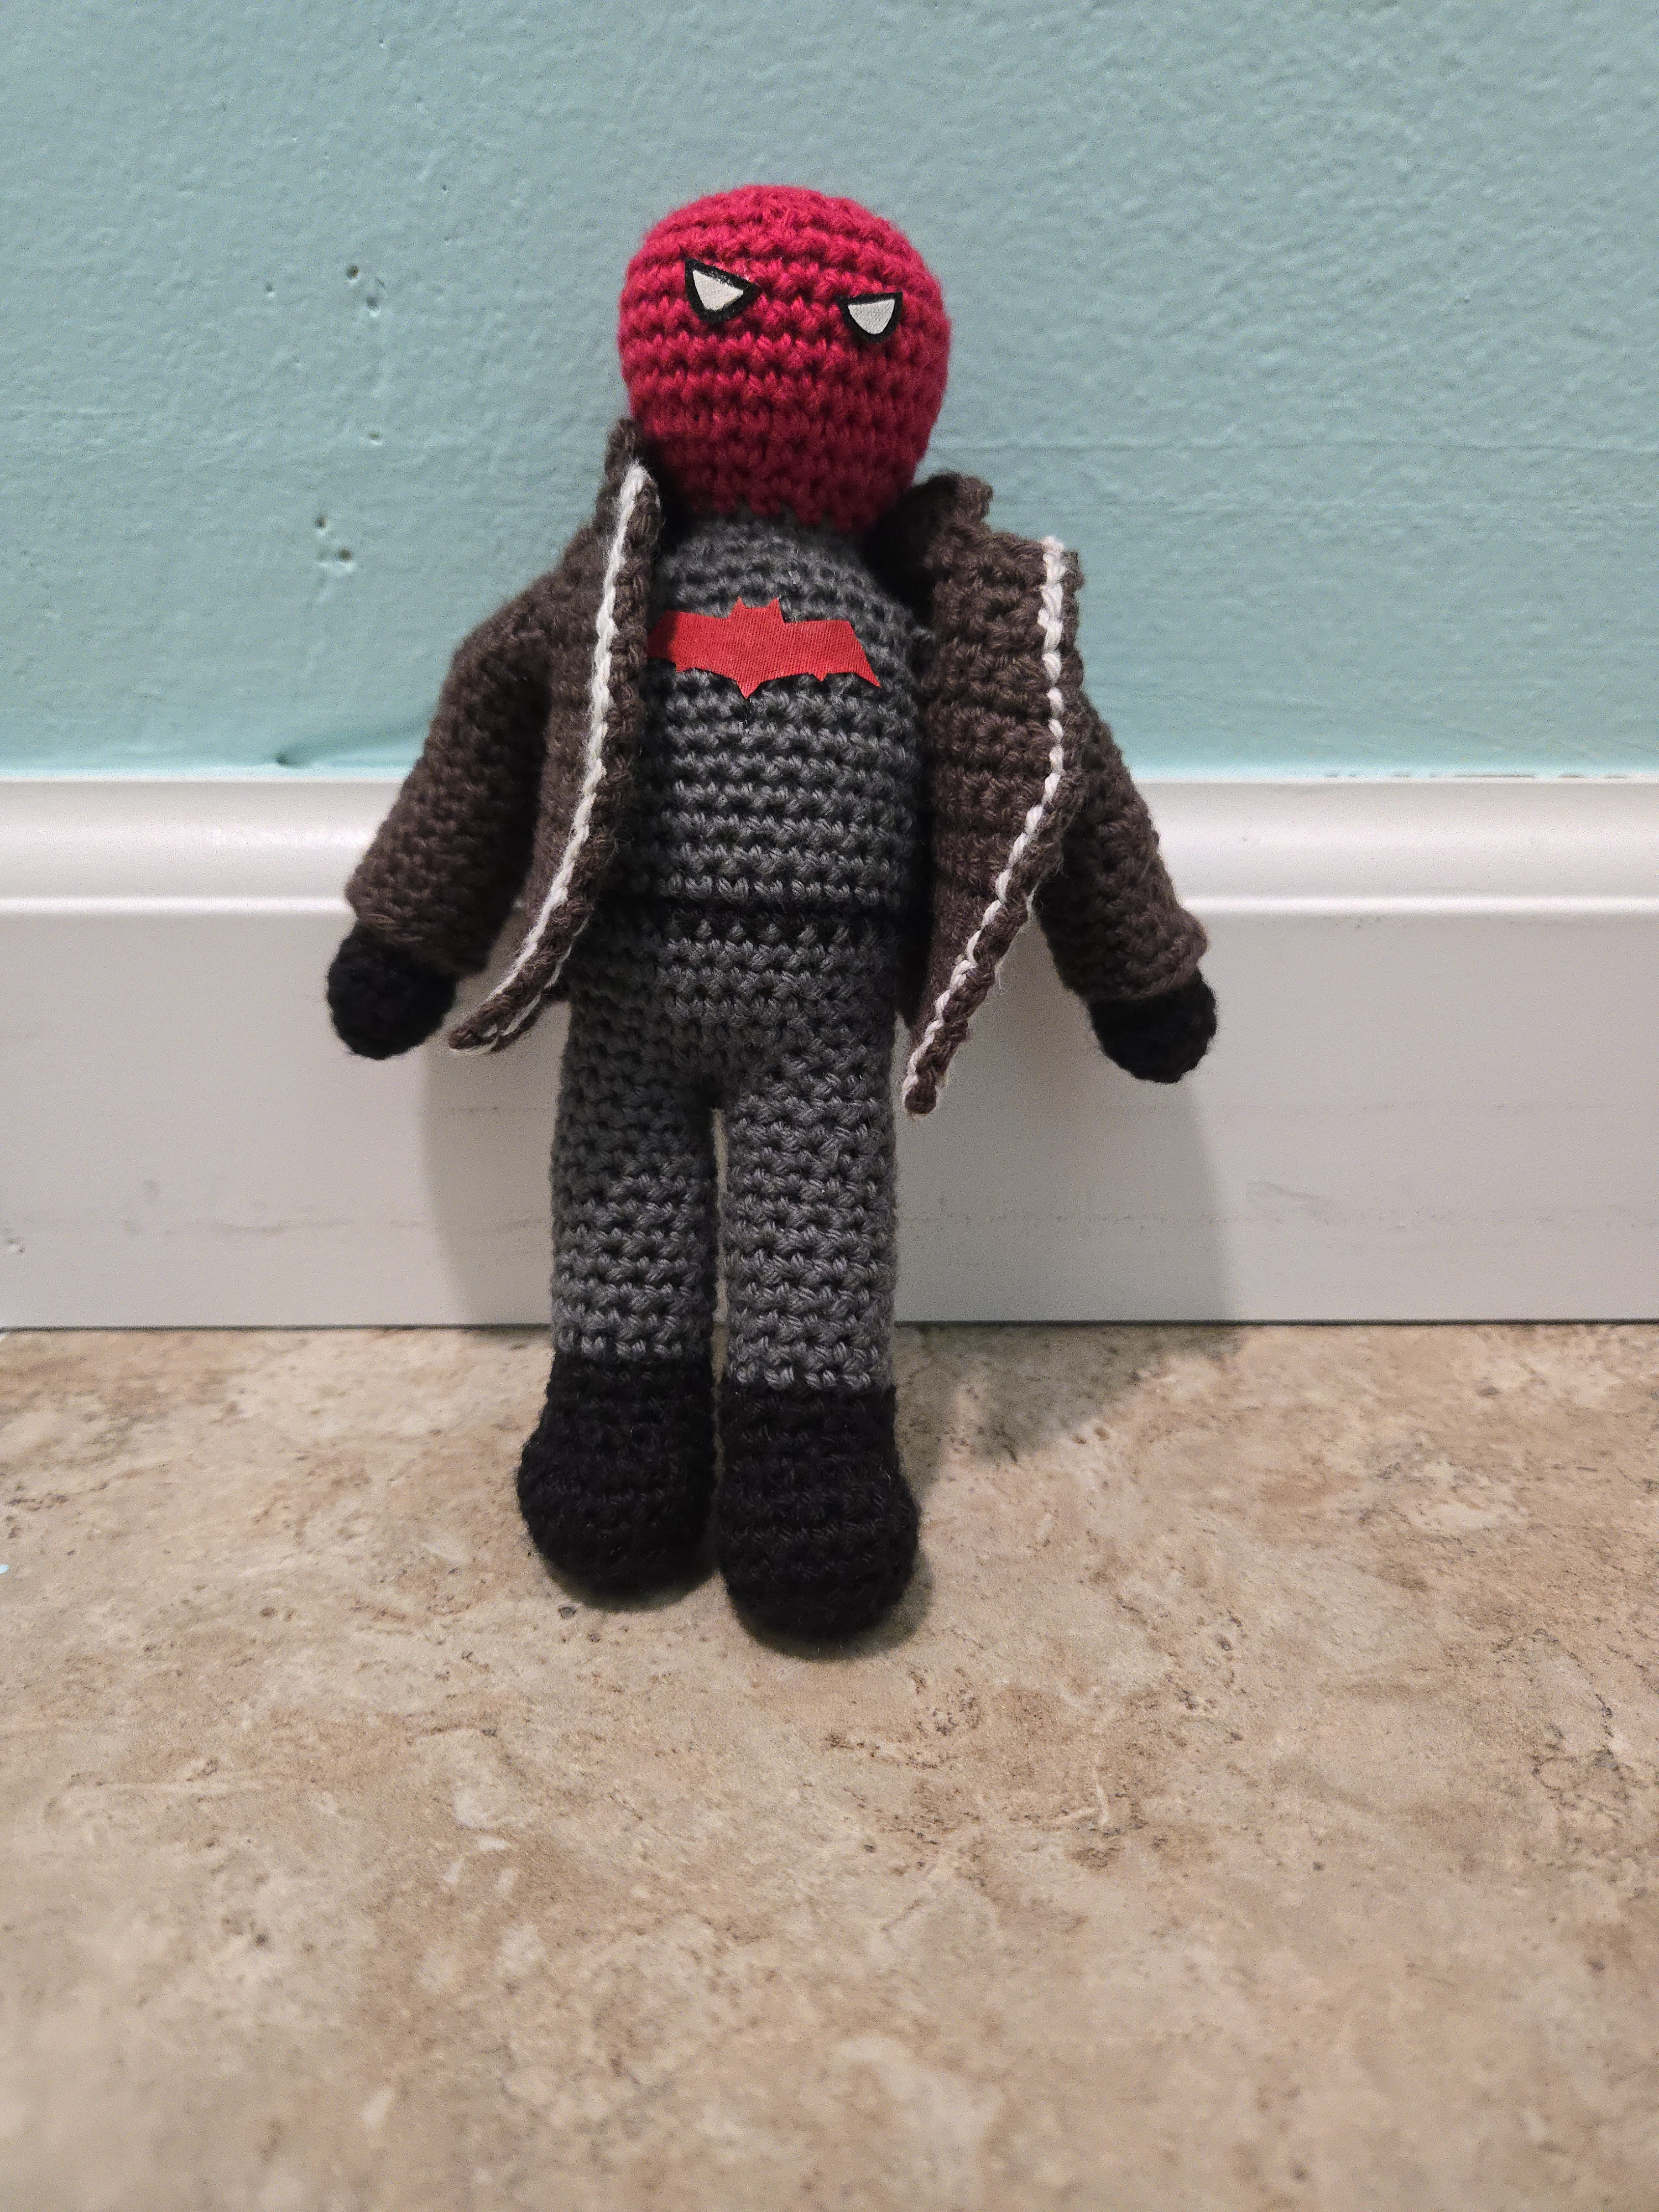
Cut out the fabric pieces for the eyes and bat. The smaller eye pieces in white and the larger in black. The bat in the red fabric. Glue them in place.
Jacket
Made in color four (brown)
Ch 35, turn and start in second chain from hook
Rows 1-12: sc across, ch 1, turn (34)
Row 13: dec, sc 30, dec, ch 1, turn (32)
Row 14: sc 6, ch 7, skip 5 sc and sc in in 6th, sc 9, ch 7, skip 5 sc and sc in in 6th, 5 sc, ch 1, turn (34)
Row 15: sc two together, sc 4, sl 7, sc two together, sc 6, sc two together, sl 7, sc 4, sc two together, ch 1, turn (30)
Row 16: sc, sc two together, sc 9, sc two together, sc 4, sc two together, sc 9, sc two together, sc, ch 1, turn (26)
Row 17: sc 3, dec, sc, dec x2, sc 8, dec x2, sc, dec, sc 3, ch 1, turn (22)
Row 18: sc 2, dec, sc 14, dec, sc 2, ch 1, turn (20)
Row 19: sl 3, ch 2, *dc 2 in one, dc* x3, *dc, dc 2 in one* x3, sc 2, sl 3 (26)
Finish off
Sleeves
Right sleeve when looking at front
Make a slip knot and attach to the back of the sleeve hole
Round 1: pick up 14 stitches around the sleeve hole around using sc (14)
Round 2: sc around (14)
Round 3: sc 6, dec, sc 6 (13)
Rounds 4-5: sc 8, hdc 5 (13)
Rounds 6-8: sc around (13)
Round 9: sc 8, hdc 5 (13)
Rounds 10-14: sc around (13)
Finish off
Left sleeve when looking at front
Make a slip knot and attach to the back of the sleeve hole
Round 1: pick up 14 stitches around the sleeve hole around using sc (14)
Round 2: sc around (14)
Round 3: sc two together, sc 12 (13)
Rounds 4-5: hdc 5, sc 8 (13)
Rounds 6-8: sc around (13)
Round 9: hdc 5, sc 8 (13)
Rounds 10-15: sc around (13)
Finish off
Zipper
Create a slip knot and attach to the bottom front corner
sl along the edge of the jacket to the top (19)
Repeat on the other front edge
I had to block the jacket. To do so I used hot tap water and pinned the body flat on a washcloth. You may or may not depending on how you like the draping.
